Preparing A Figure For Conversion
On This Page
- Figure Preparation
- Planning The Export Process When Exporting Assets Separately
- Conversion Optimisations: Enhanced JCMs
- Conversion Optimisations: Reducing Pokethrough
Figure Preparation
The library of assets available for Daz figures is vast and there is a significant amount of variance in the way in which assets have been created. Because of this, the DTL conversion process, whilst robust, can sometimes fail or produce unexpected results. To minimise the risk of this, it is recommended that the following checks are made on your figure before submitting to the conversion process. In the case where the conversion fails or produces unexpected results, please contact us. We will do our best to find a way to fix any issues wherever possible.
A note on subdivision levels: In general, clothes, hair, shoes etc have a far higher vertex density than the Daz figures. For this reason, it is recommended that if the figure is exported at a subdivision level higher than zero, the clothes, hair, shoes etc are should be exported with a subdivision level set one lower than for the figure. For example, if exporting a subdivision level 1 figure, it is best to export any clothes, hair, shoes etc at subdivision level 0.
1. Ensure your figure is in the default pose It's essential that the figure is exported in the standard Daz A-Pose. The only exception is if you figure has a foot pose (i.e. for specific shoes). To make sure the figure is posed correctly, first go to Edit -> Figure -> Restore -> Pose. If your figure has a foot pose you will need to re-apply it after restoring the A-Pose. Taking the shoes off then on again will do this if there is not a 'foot pose' setting for the shoes.
3. Open an Unreal Engine 5 project with the DazToUnreal plugin enabled The project is then ready to automatically import your figure's materials when the initial DazToUnreal fbx export is run. Note that the DazToUnreal plugin is only used in Unreal Engine to automatically import materials. If you are using the DTL (or any other) materials, you do not need the DazToUnreal plugin enabled in your Unreal Engine project.
Planning The Export Process When Exporting Assets Separately
DTL can be used to to export complete figures or export assets separately. Exporting assets separately has a number of advantages; processing times are shorter, any required non-manifold geometry fixes are more likely to succeed and runtime character customisation in Unreal Engine becomes possible. When exporting assets separately there are a number of ways in which the process can be streamlined.
Before continuing, it's recommended to save a backup of your completed Daz character in DazStudio. Then start by deleting all hair, shoes and other assets you may want to swap out at runtime. Export this figure as your base figure in the normal way (see here).
Once you have exported your base figure and the conversion process is underway in Maya, start adding and exporting assets one by one. Since many shoes require foot joint rotations, it's best to export them last.
Important: Ensure you export the exact same assets when running the DazToUnreal and DTL export processes
Do not make any adjustments to your figure's shape or skeleton after you have exported the base figure using the DazToUnreal plugin.
Ensure you have the same selection in the DazStudio scene view for both exports.
Conversion Optimisations: Enhanced JCMs
DTL creates JCMs and other morphs by sampling the mesh under different conditions in DazStudio. Because of this, the effect of JCM enhancements that are applied automatically when joints are rotated (e.g. Bend Control for Genesis 8 Female) are merged into the JCMs. This gives significantly better results and is recommended. Note that the purchase of an interactive licence is required.
Conversion Optimisations: Reducing Pokethrough
1: Hiding Unseen Geometry
Important: Due to the way the DazStudio obj exporter works, hiding geometry is only possible on figures exported at subdivision zero. Figure body geometry that will always be hidden by clothes etc can be disabled before export to both reduce pokethrough and reduce the vertex count of the final figure. The image below demonstrates hiding the body geometry around the pelvis.
 Hiding body mesh parts before export
2: Use Mesh Offset for any items of clothing
It is possible to offset the clothing mesh from the figure. This can be achieved by selecting the clothing item, going to Main menu -> Edit -> Figure -> Geometry -> Add Push Modifier. A Push Modifier, whilst not ideal, is mostly un-noticable when set to less than 0.35. For further advice on avoiding pokethrough issues, see the tutorial movie here.
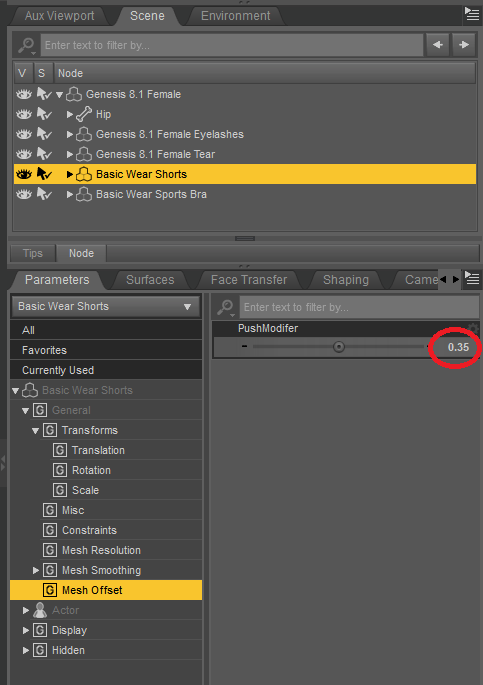 DazStudio 'Push Modifier' for offsetting clothes
3: Smoothing and Collision Iterations
If there are pokethrough issues when morphs are applied, increasing the number of Smoothing and Collision Iterations on the item of clothing in DazStudio can solve many problems. This is a quality / speed trade off; the higher the iteration count, the longer the DazScript will take to run.
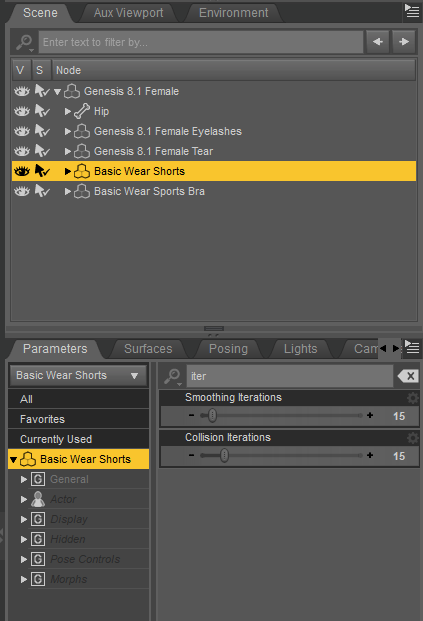 DazStudio Smoothing and Collistion Iteration Settings
4: Enable Interactive Update
In general, it is best to enable Interactive Update for clothes but not hair. Enabling on clothes / shoes helps reduce poke through issues. The Daz DTL script will prompt to turn on Interactive Update for any items of clothing that support the feature.
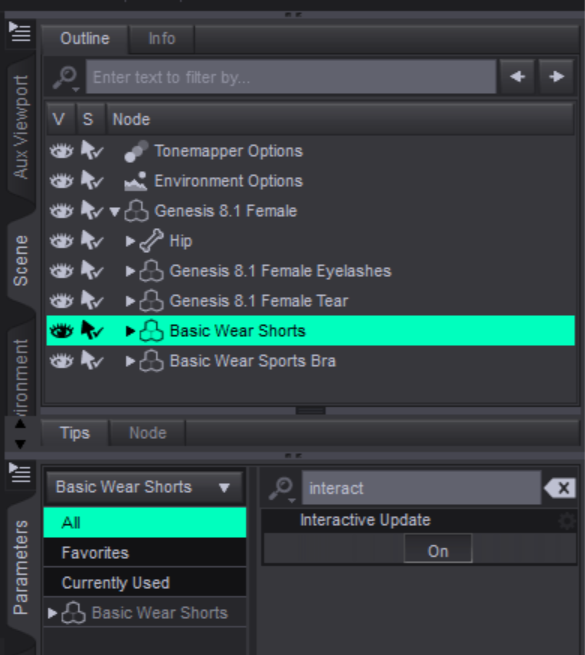 DazStudio Interactive Update Setting