DTL Custom Materials
On This Page
The demo project contains templates for custom materials. The DTL Materials are intended for intermediate / advanced users. The DTL Materials have a number of advantages over the ones exported by DazToUnreal:
- 'Selective AO Masks' that shade problem areas like the nostrils, ears and eyelids
- Addition of Micronormals to give a more realistic skin surface and light scatter
- 'Seam Matching Brightness' setting to help reduce any visible seams issues caused by Recomputing Tangents
- Eye moisture material based on the new Single Layer Water Material
Templates are provided in the DTL demo projects. This page describes the process of creating DTL materials for your character using the supplied DTL Material templates.
Gifs are used extensively on this page to demonstrate configuration. As a result, the page may take some time to load.
Importing Textures
Inside the folder containing your fbx and dtu files, there is a folder called ExportTextures. This folder contains the minimal set of textures required for your character including any bump maps that have been converted to normal maps by the DazToUnreal plugin. If 'Scan for Textures' was enabled when the Daz DTL script was run, there will also be a folder called AllTextures. AllTextures contains all the textures associated with your figure / asset; colour options, makup options etc. It is the user's choice whether to import just the minimal set of textures or the complete set. Note that the complete set does not include any normal maps converted from bump maps that the DazToUnreal created, so the choices are; import the minimal set or import both sets.
Create a new folder inside the UE demo project Characters/DTL/Materials folder and name it the same name as your figure. Create another folder called Textures inside this folder. Drag and drop the textures you intend to use into the Textures folder.
Converting Textures
For optimal results, it is recommended to change both the Encoding and Color Space of the imported textures. To do this, select all of the textures, then individually deselect all of the Normal maps. Right click one of the selected textures and click 'Bulk Edit via Property Matrix'.
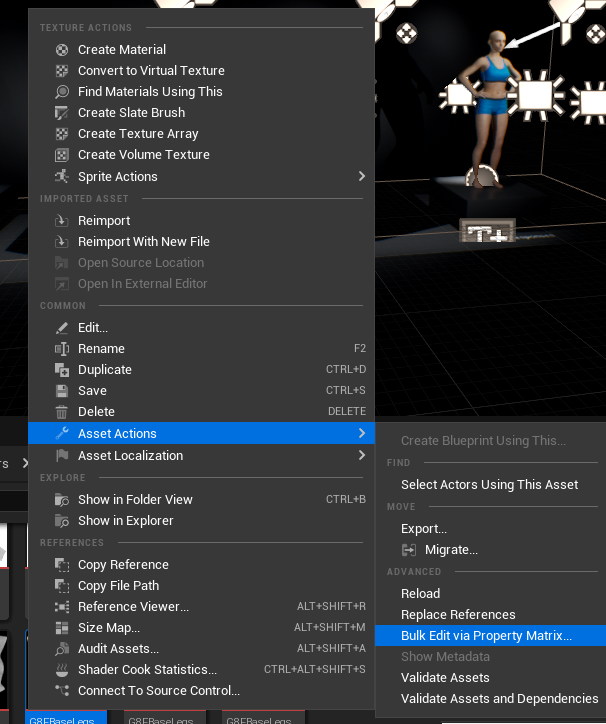 Bulk editing textures
In the Bulk Edit via Property Matrix, find the Source Color Settings -> Encoding Override and select Gamma 2.6. The Color Space setting is below the Encoding Override. Set the Color Space to sRGB / Rec709.
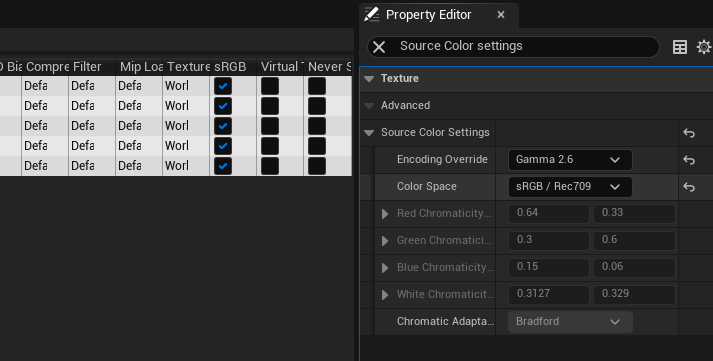 Setting the Encoding Override and Color Space
The textures are now ready to use.
Micronormals
The DTL demo project ships with a micronormal texture taken from the Metahuman project. Some Daz characters have associated micronormal textures. Any micronormal textures for your figure will be found in the AllTextures folder inside Documents/DazToUnreal/(figure name)/ExportTextures if Scan For Textures was enabled for the DTL Daz script. If there is a micronormal texture exported from DazStudio, it is recommended that the MetaHuman micronormals are replaced with the Daz ones. However, the micronormal tile values are different for each, so the micronormal tiling value will need to be updated for each of the affected Materials. Here is a comparison of the micronormal tiling values for each affected Material:
| Material | Daz Micronormal Tiling | Metahuman Micronormal Tiling |
|---|---|---|
| Arms | 24.3 | 73 |
| Face | 10 | 30 |
| Body/Torso/Gens | 41.2 | 123.6 |
| Head | 11.6 | 34.8 |
| Legs | 33.3 | 100 |
The Micronormal tiling values are set in the Normals section of the Material editor, as shown in the image below.
 Setting the Micronormal Tiling Values for a Material
DTL Material Templates
The DTL demo project come with a set of Material templates to help speed up the process of creating new materials. The recommended workflow is to copy all of the Materials found in Characters/DTL/Materials/DTL_MaterialsTemplates to the same folder where you imported your Textures. The templates are preconfigured and should only require the addition of Textures.
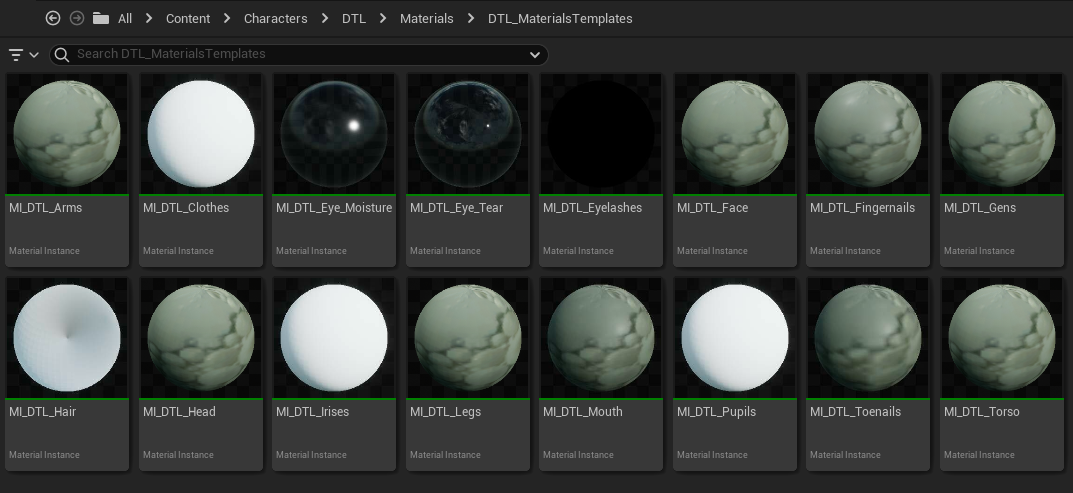 The DTL Material Templates
Skin Materials
The DTL skin materials are designed to accept whichever textures are available for a character. Below is a list of textures that are supported.
- Albedo / Diffuse
- Specular
- Metallic
- Roughness
- Normal
- Micronormal
- Overlays (see the Skin Overlays section below)
Note that Bump maps are not well supported in UE. This is why the DazToUnreal plugin converts them to Normal maps. The Normal maps can be found in the Exported Textures folder in the same folder as the .dtu file.
The recommended workflow is to import your figure's Textures as described above and see which ones are present for each Material. Once it is clear which Textures the figure's skin Materials use, enable each Texture in the Materials settings and drag the Textures onto their correct slots.
Recomputing Tangents
The fbx file specification does not allow for the exporting of normals for JCMs and other morphs. This will result in shading errors when certain morphs are applied. This can be fixed by enabling the Skin Cache and requesting that Unreal Engine recompute tangents for the affected materials. However, doing so creates fresh issues with visible seams. Unfortunately, these are the only options; visible seams or shading errors. There is detailed information on this issue here.
Recomputing Tangents 1: Enable 'Support Compute Skin Cache' must be enabled in the project settings (this is already set in the demo project)
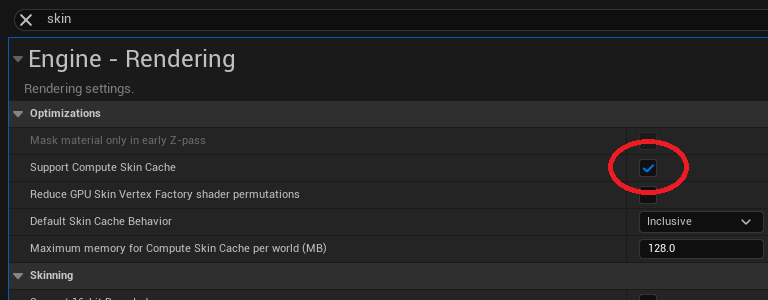 Setting Recompute Tangents to All
Recomputing Tangents 2: 'Recompute Tangents' must be set to 'All' for materials in the Skeletal Mesh editor. The setting can be found under LOD0 -> Sections in the figure's Persona. Unreal Engine often takes a significant amount of time to recompute the tangents for each material slot. To save time, usually only the following Material Slots need adjustment; Head, Arms, Legs, Body / Torso, Gens.
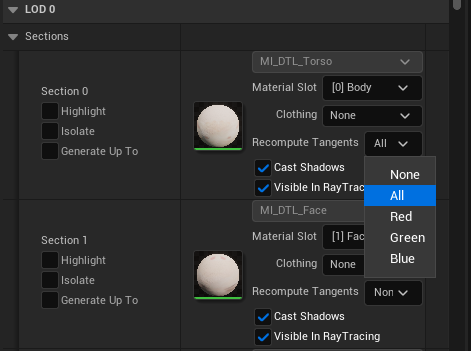 Setting Recompute Tangents to Red or Blue
Matching Seams
As described above, recomputing tangets can cause seams to become visible. These artefacts can be minimised by adjusting the Seam Matching Brightness in the Albedo Section of a DTL Skin Material.
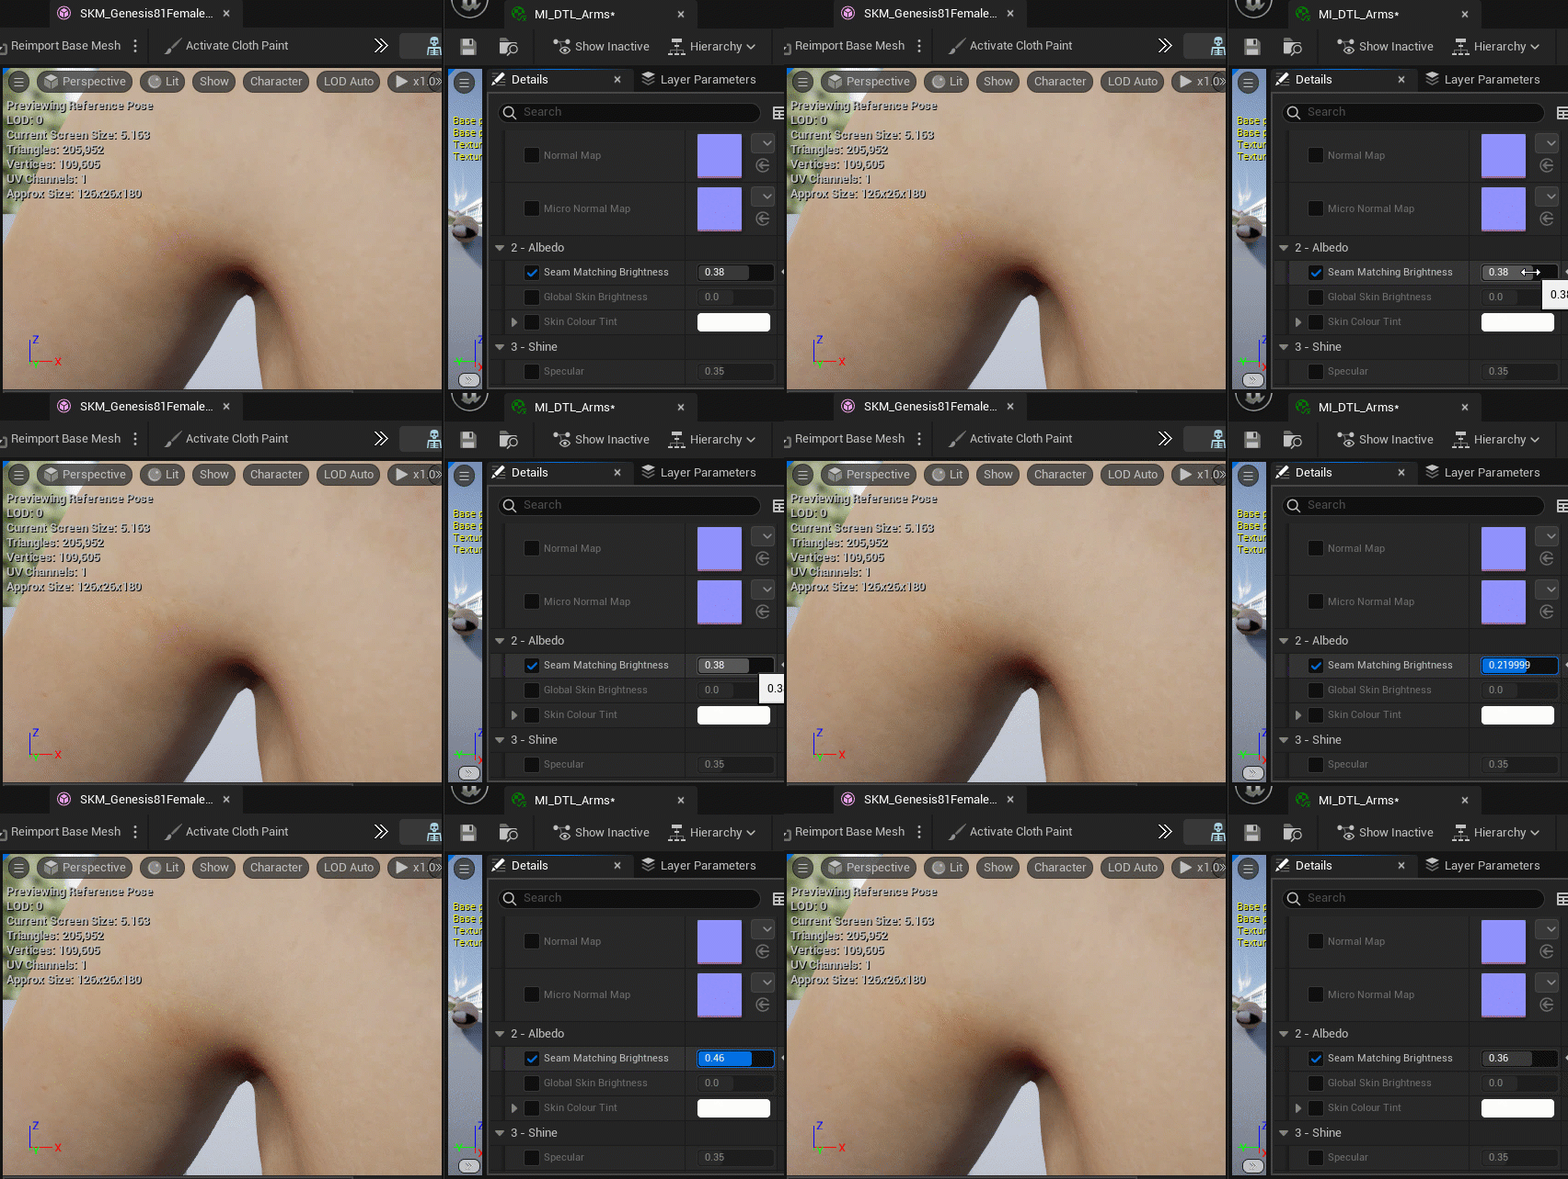 Adjusting the Seam Matching Brightness
Skin Overlays
Daz figures overlay Textures using a variety of methods. The DTL Materials support the following overlay methods:
- Selective AO (Three channel masks for nostrils / ears / eyelids (preconfigured and supplied with DTL))
- Tattoos (Textures with an alpha channel)
- Makeup (Textures with no alpha channel and a separate opacity mask)
- Eyebrows (Opacity mask and colour selection)
These methods are described below.
Skin Overlays: Selective AO Masks
DTL skin Materials contain SAO (Selective Ambient Occlusion) functionality to reduce lighting issues in problem areas such as the nostrils and ears. SAO is enabled in the DTL Face Material template by default. The correct SAO map can be selected from the 'Selective AO Mask' drop down menu.
There are three SAO masks inside the demo project:
- T_G8F_Face_SAO_mask (Face SAO for Genesis8/8.1 female)
- T_G8M_Face_SAO_mask (Face SAO for Genesis8/8.1 male)
- T_G8_Navel_SAO_mask (Navel SAO for Genesis8/8.1 male or female characters)
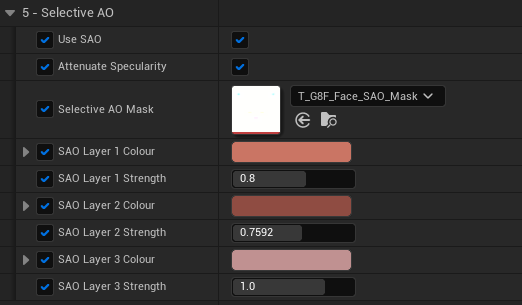 SAO menu
The tint and strength of the AO can be adjusted to better match skin colour. Two SAO maps are provided inside the project for use with the Face and Torso skin Materials.
- Face: SAO Layer 1 = Ears, SAO Layer 2 = Nostrils, SAO layer 3 = Eyelids
- Torso: SAO Layer 1 = Navel
Skin Overlays: Tattoos
Some Daz figures come with tattoo options. Tattoos typically come as a png file with an alpha channel. If Scan for Textures was enabled when the DTL Daz script was run, the Textures for any tattoos will be found in the AllTextures folder inside the ExportedTextures folder inside the folder containing your .dtl file.
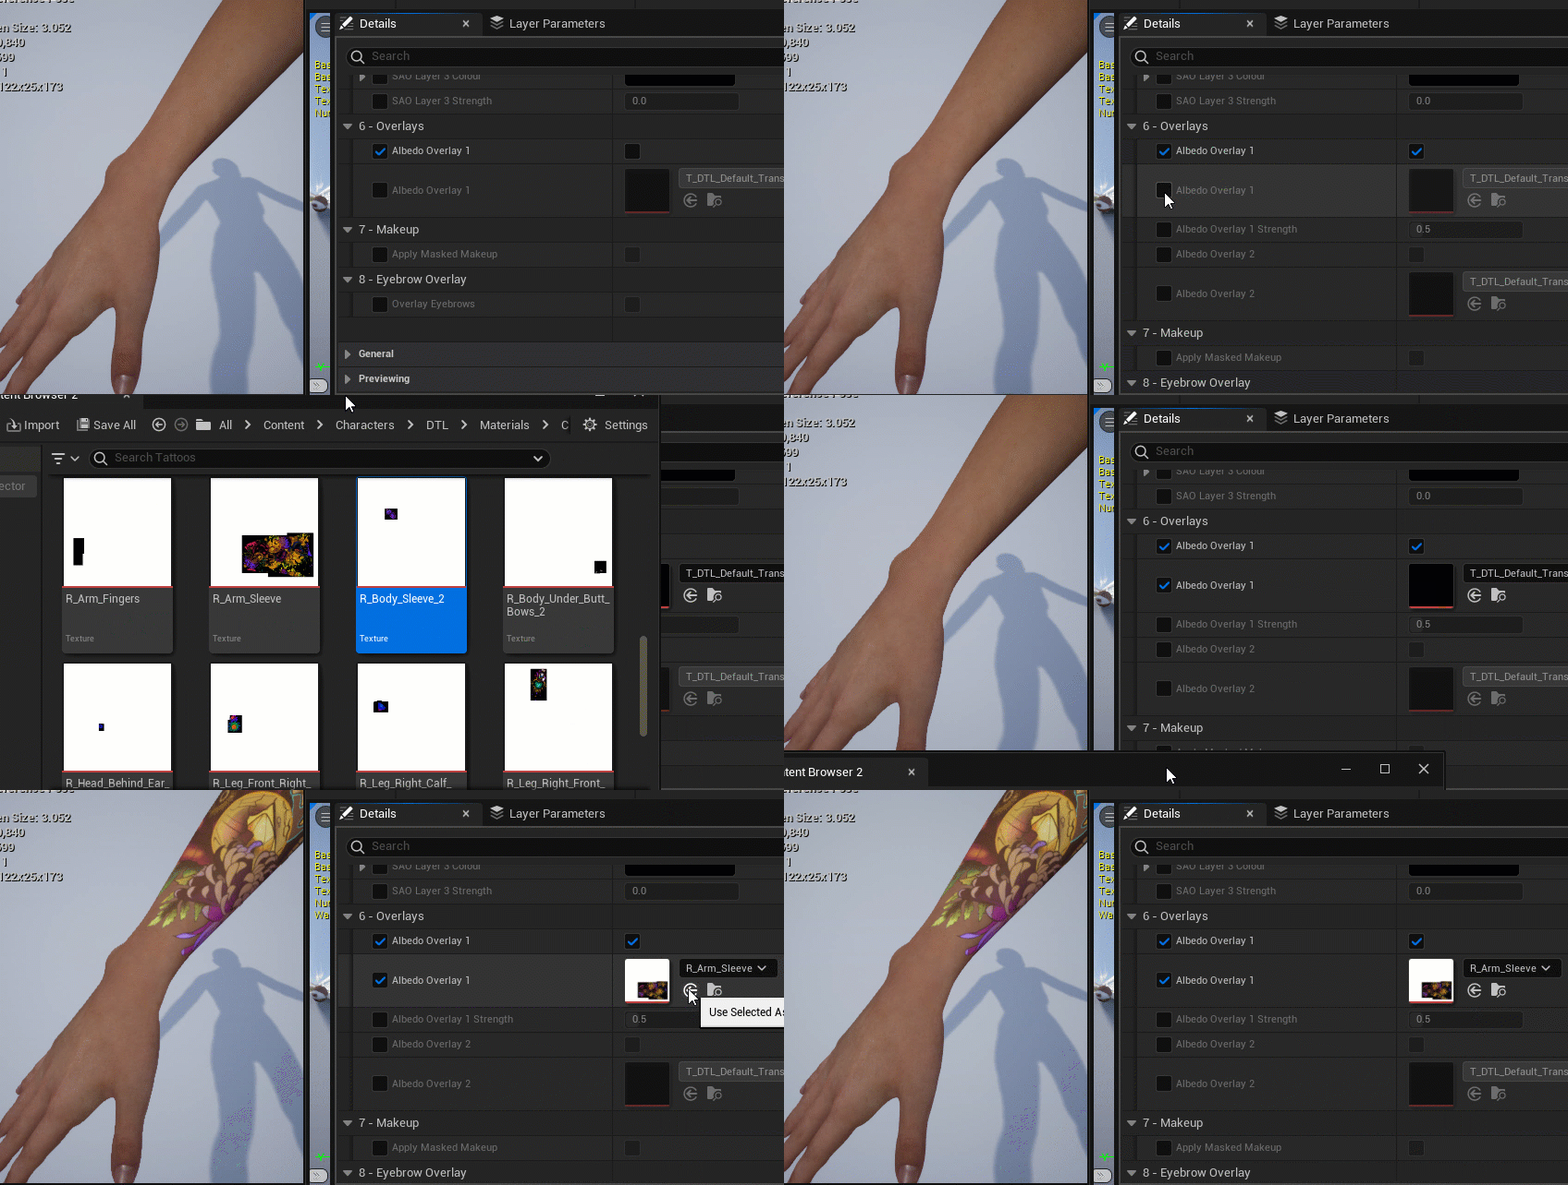 Adding a tattoo overlay
The tattoo functionality is not limited to tattoos; it enables the overlay of any Texture that has an alpha channel. For example, some figures use a Texture with an alpha material to overlay a Blush makeup overlay. Up to five tattoo overlay textures can be added to any skin Material. However, depending on your project requirements, using all five overlay slots may cause performance issues.
Skin Overlays: Makeup
Many figures come with makeup options. In some cases the makeup option is a replacement albedo / diffuse texture for the face. In this case the makeup can be applied by swapping out the albedo texture for the face.
In other cases, the makeup option comes as a texture and corresponding alpha mask. The DTL skin Material supports adding up to two makeup overlays per Material.
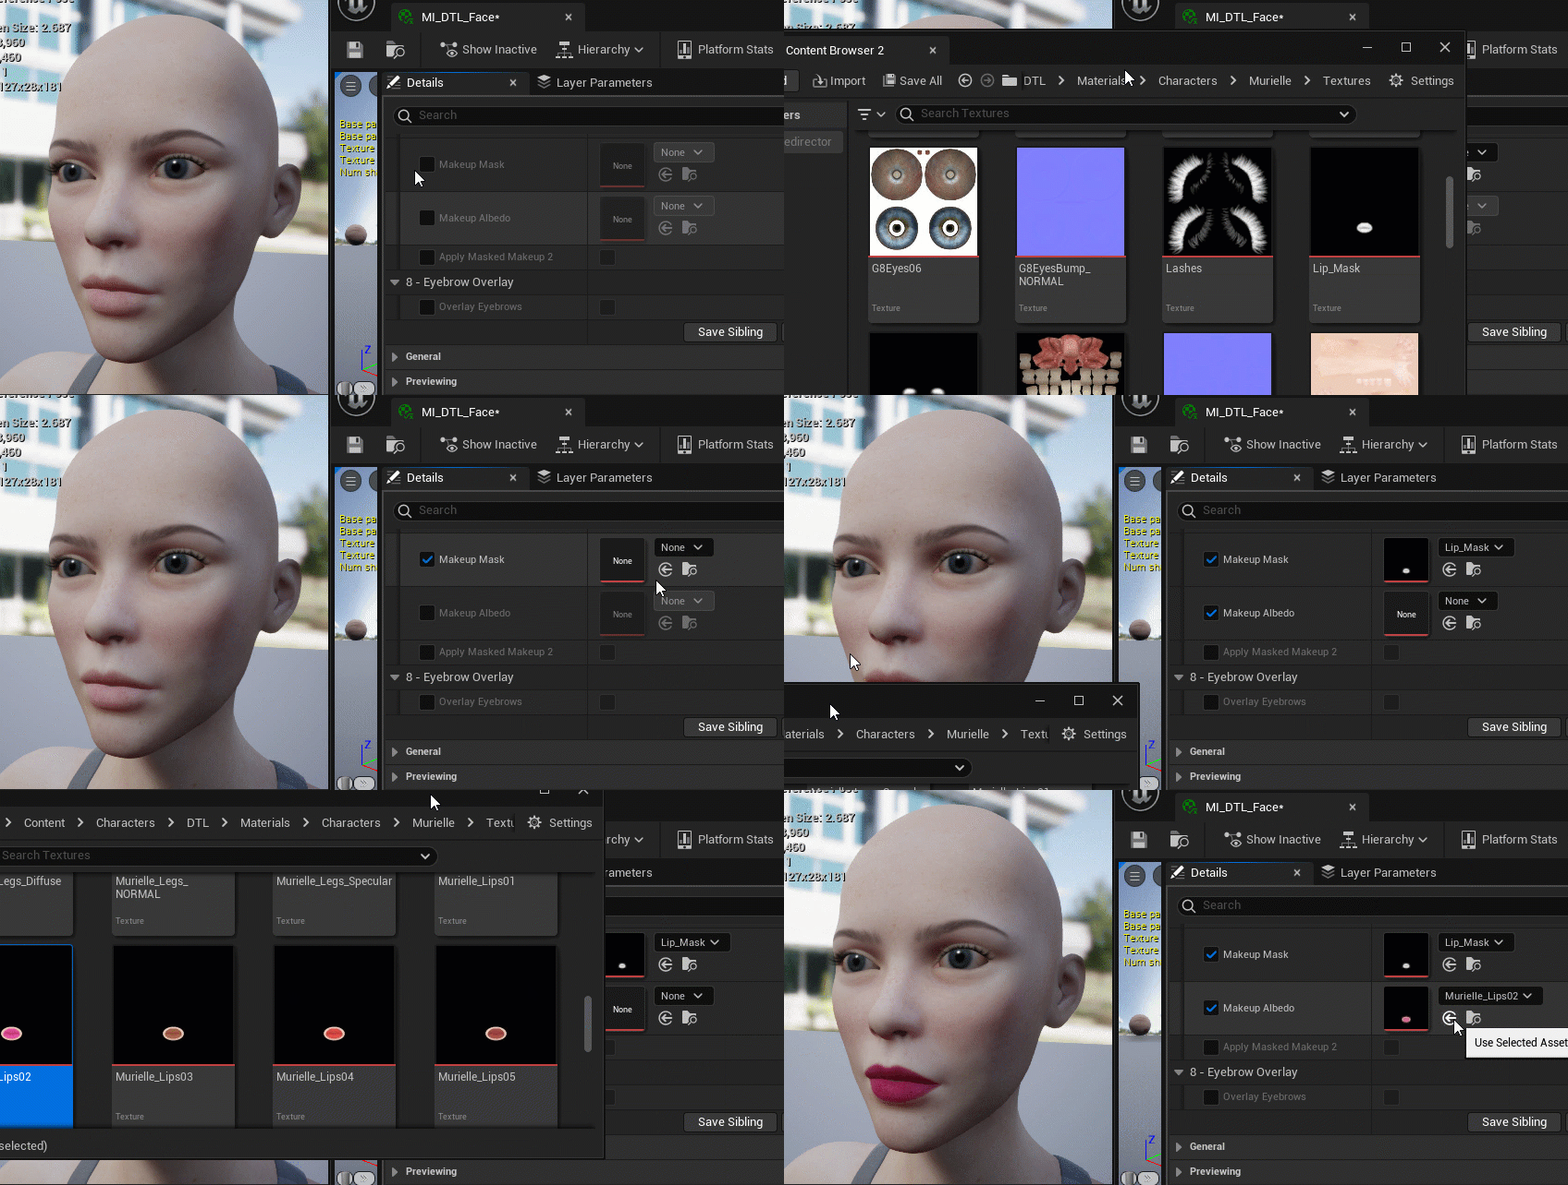 Adding a masked makeup overlay
Skin Overlays: Eyebrows
Some figures use fibermesh eyebrows. Fibermesh eyebrows have a high vertex count, cause delays when importing figures into Unreal Engine and negatively affect performance. For these reasons, the use of fibermesh eyebrows (and fibermesh hair) is not recommended.
However, the skin Textures for some figures with fibermesh eyebrows do not include eyebrows. To overcome this, DTL materials can be configured to use a coloured overlay in place of fibermesh eyebrows.
This requires the production of a eyelashes mask. Fortunately this is a relatively simple task in GIMP. There is a tutorial movie below. Photoshop users should be able to follow the steps.
Eye Materials
For Genesis 8 figures, there are three materials used for the character's eyes; Pupils, Irises and Eye Moisture. For Genesis 8.1 figures, there is an additional Material for the tear line called Tear.
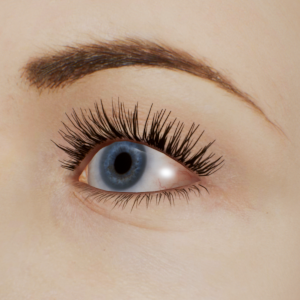 The DTL Eye Materials
Eye Moisture
The Eye Moisture Material uses Unreal Engine's Single Layer Water Material. The Material uses the standard index of refraction for human eyes. No configuration is necessary. The Tear Material requires a mask for the Cutout Opacity Texture. This Texture will have been exported along with all the other Textures by the DazToUnreal Plugin.
Iris and Pupil
The Iris and Pupil Materials only require two Textures; Albedo and Normal Map. These Textures will have been exported by the DazToUnreal Plugin. Note that the two Materials are not combined, as they often have different Normal Maps.
Hair Materials
Broadly speaking, there are three types of hair material; Main body, flyaway / strands and skullcap. When adding the Textures for the hair Materials, it may be necessary to adjust the opacity.
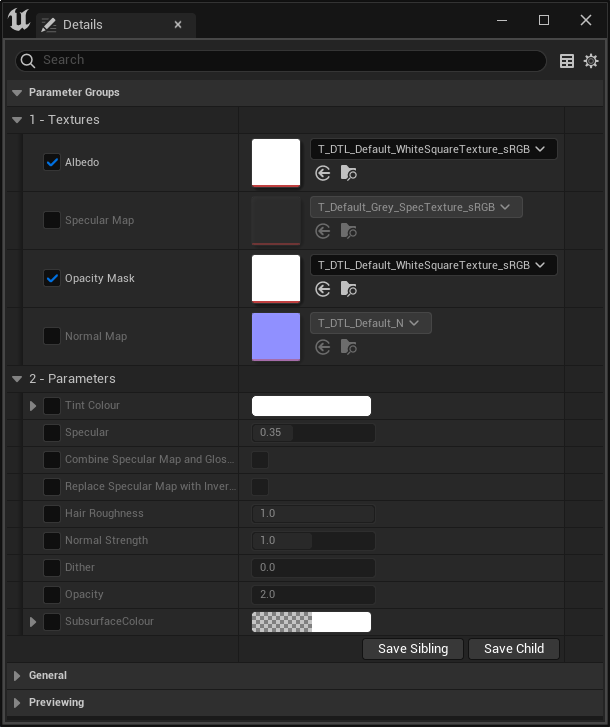 The DTL Hair Material Template
Clothes Materials
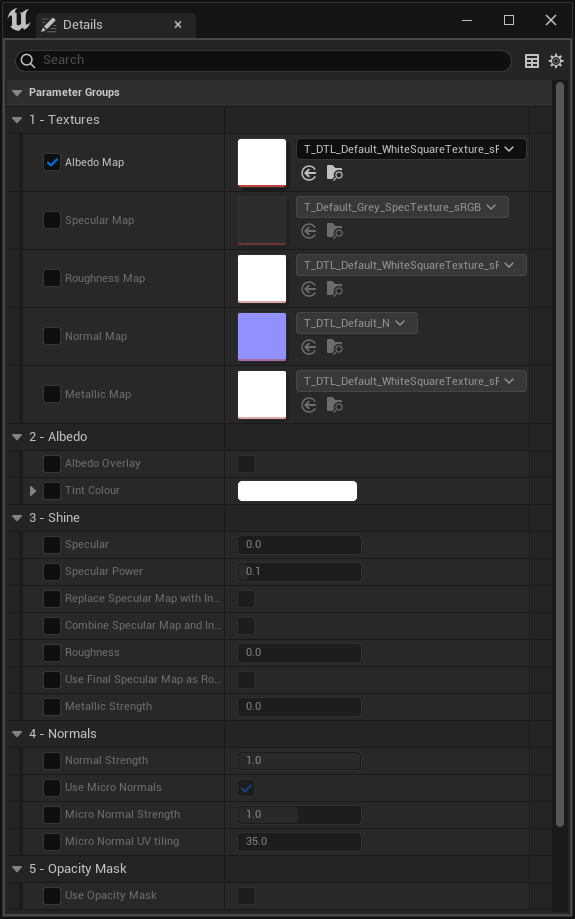 The DTL Clothes Material Template
Eyelash Materials
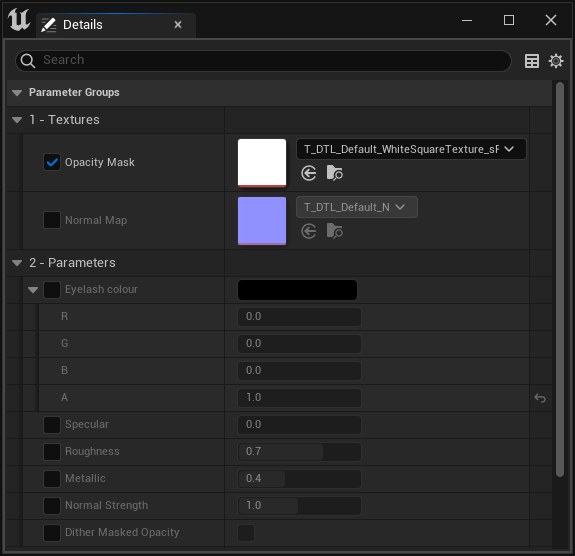 The DTL Eyelash Material Template